What is Unity? An In-Depth Introduction for Beginners
In the ever-evolving world of game development, one name stands out for its accessibility, power, and community support: Unity. But what is Unity, and why has it become the go-to game development engine for developers around the globe? This article will dive deep into Unity, offering a comprehensive guide for those looking to start their journey in game development.
What is Unity?
Unity is a cross-platform game development engine created by Unity Technologies. It enables developers to create 2D and 3D games for almost every platform you can think of: PC, consoles, mobile devices, and even AR/VR platforms. But Unity's capabilities extend beyond just game development; it's also widely used in industries such as film, automotive, architecture, and more for interactive simulations and visualizations.
Understanding Unity's Interface and Environment
Before diving into coding and game design, it's crucial to familiarize yourself with Unity's interface and environment. Unity's editor is designed to be intuitive, but it comes packed with features that can be overwhelming for beginners.
Navigating the Unity Editor
The Unity Editor is where you'll spend most of your time, crafting scenes, tweaking assets, and scripting behaviors. It comprises several panels like the Scene view, Game view, Hierarchy, Project, and Inspector, each serving a distinct purpose in the game development process.
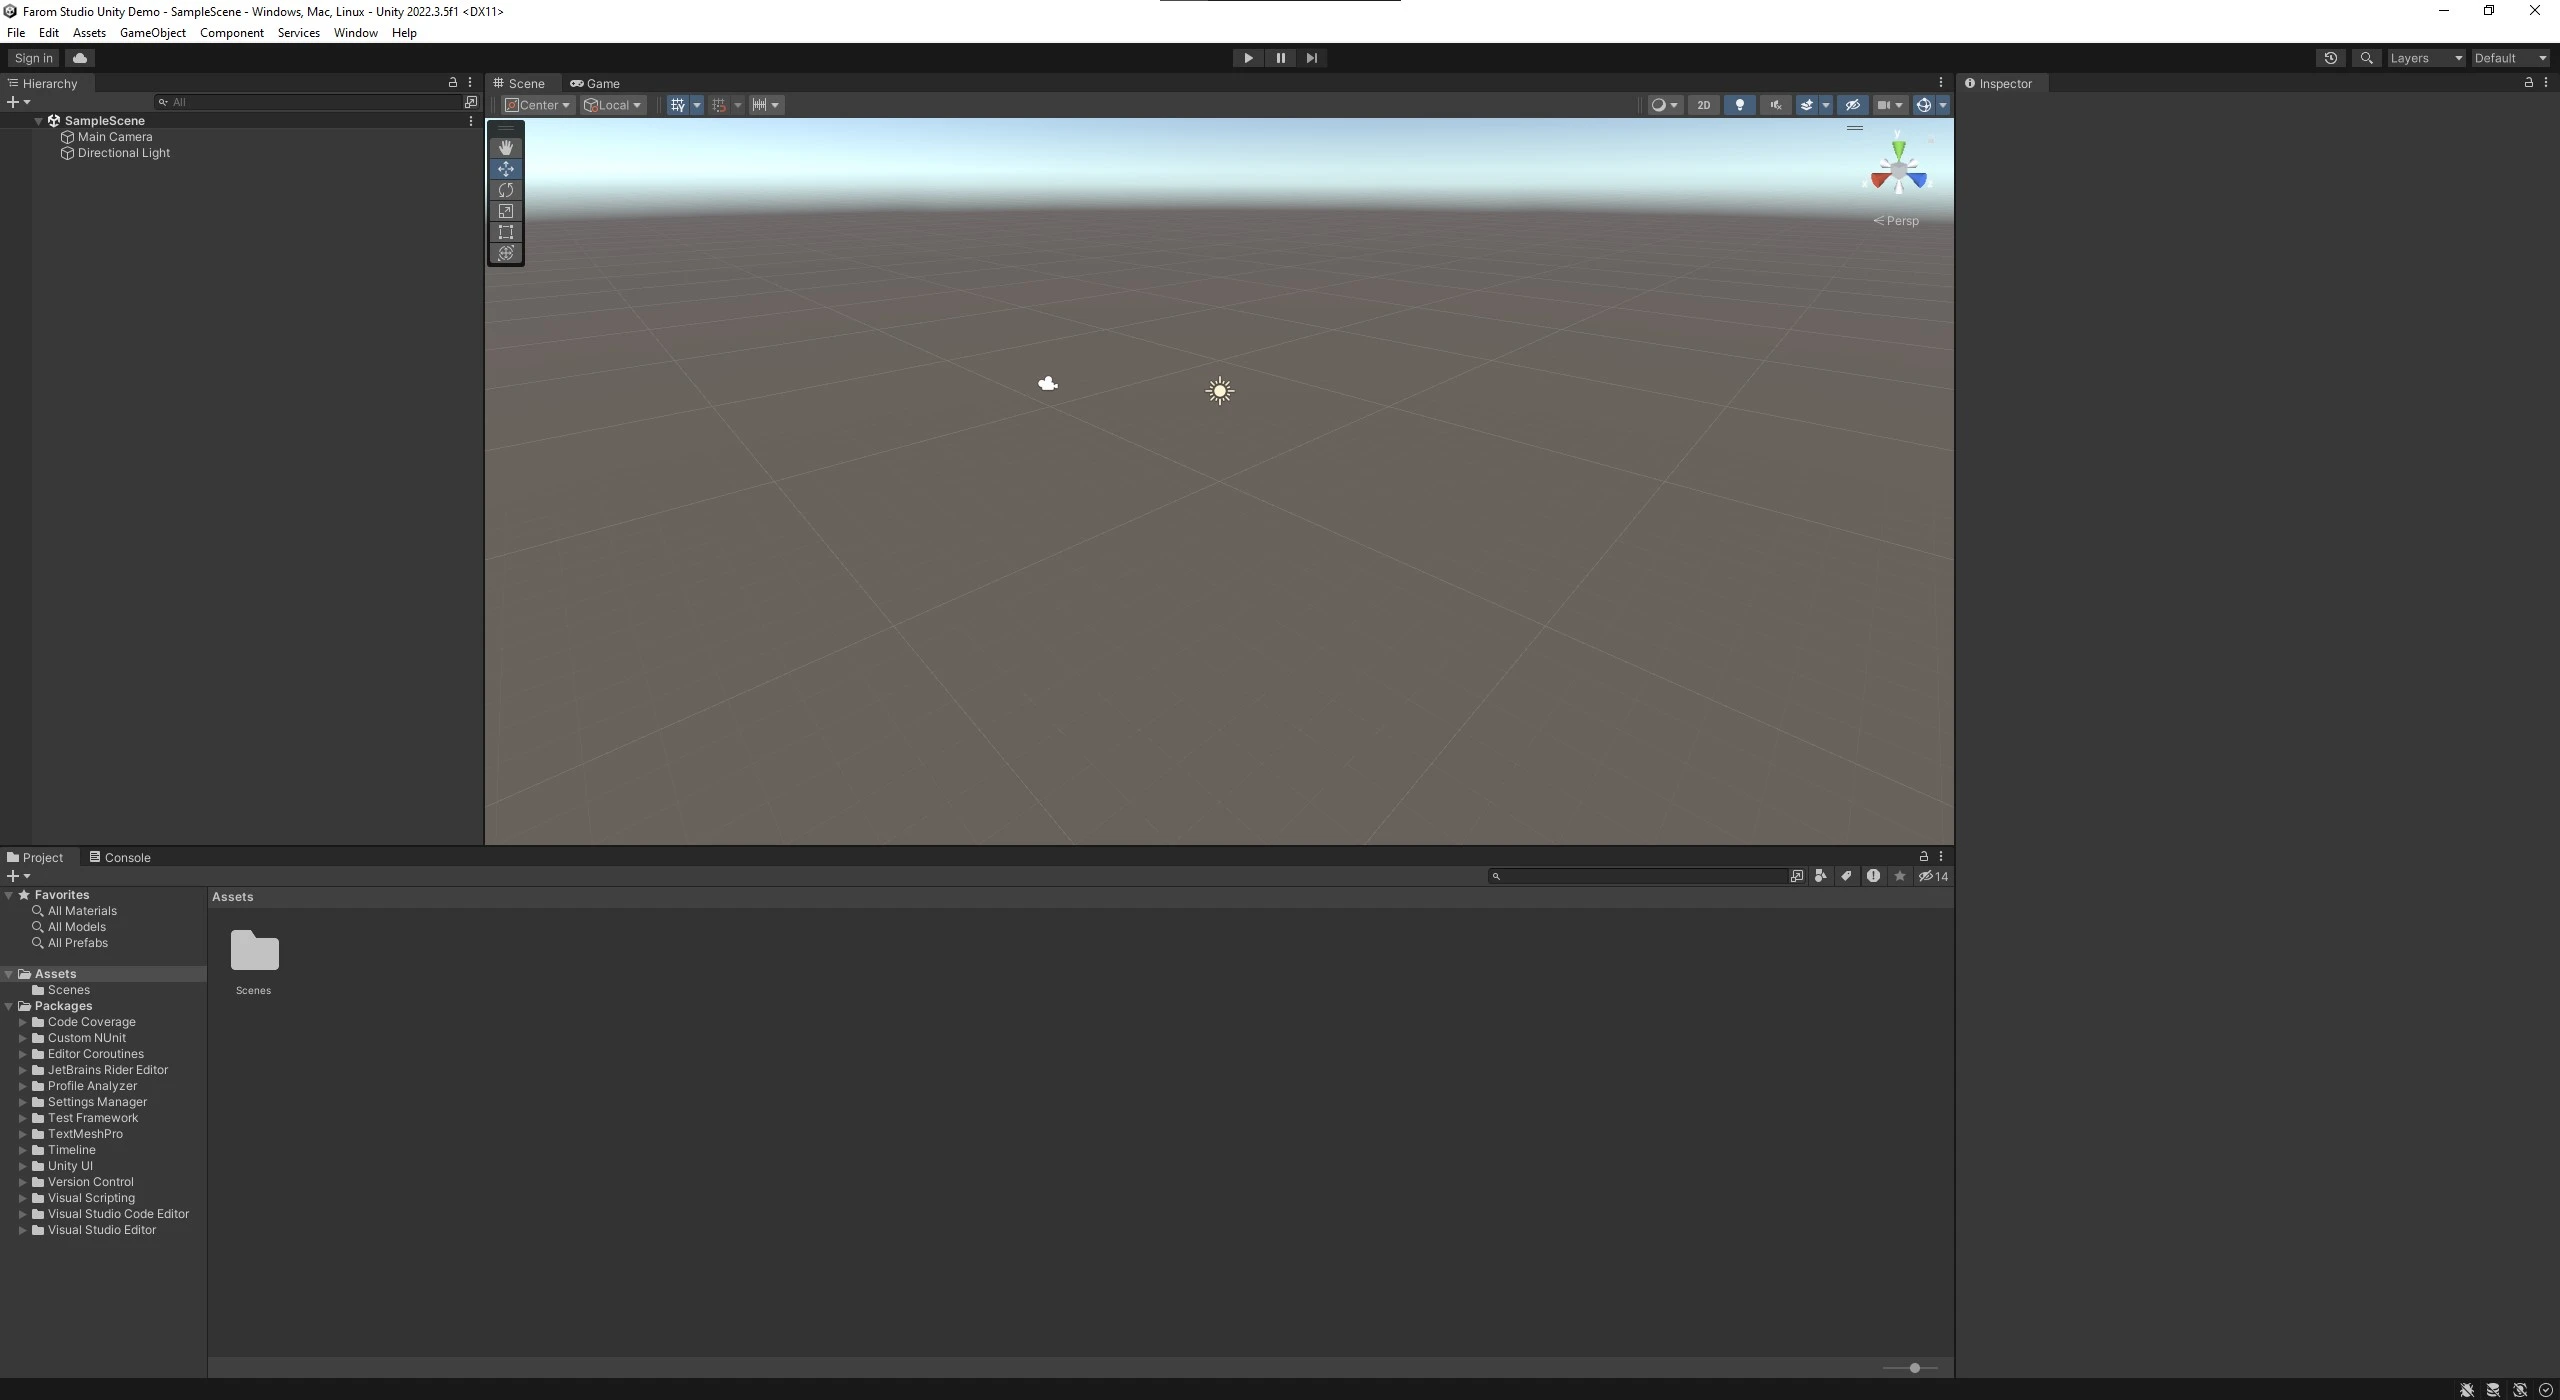
The Unity Editor is the heart of your game development journey, a powerful interface where creativity meets functionality. Familiarizing yourself with its components is the first step towards bringing your game ideas to life. Here’s a closer look at the essential parts of the Unity Editor:
Scene View
The Scene View is your interactive canvas, a 3D workspace where you can place and manipulate game objects. Here, you can design levels, set up environments, and arrange your assets exactly how you want them to appear in the game. Use the Scene View to navigate through your game world from any angle, providing a first-hand glimpse into how your game will look and feel.
Game View
The Game View gives you a preview of your game from the perspective of the camera you've set up. It's essentially what your players will see when they play your game. You can playtest your game in real-time within the Game View, allowing for immediate feedback and iteration on your designs.
Hierarchy Panel
The Hierarchy Panel is your project's organizational backbone. It lists all the game objects in the current scene, both visible and invisible. Think of it as the table of contents for your scene. You can use the Hierarchy to select, group, and manage your objects, making it easier to navigate complex scenes.
Project Panel
The Project Panel is where all your assets - textures, models, scripts, and more - are stored and managed. It's the library of all the resources available to you for your current project. Organizing this panel effectively will save you time and streamline your development process.
Inspector Panel
When you select an object in Unity, the Inspector Panel displays its properties, allowing you to tweak and customize them to your liking. This panel is crucial for editing the functionality of your game objects, from adjusting their physics to scripting their behavior.
Console Window
The Console Window is essential for debugging, displaying errors, warnings, and other messages from your game's runtime and scripts. It's a valuable tool for identifying and resolving issues that arise during development.
Importing Assets
Unity's Asset Store is a treasure trove of models, textures, sounds, and tools that can accelerate your game development process. Learning how to import these assets and integrate them into your projects is a foundational skill.
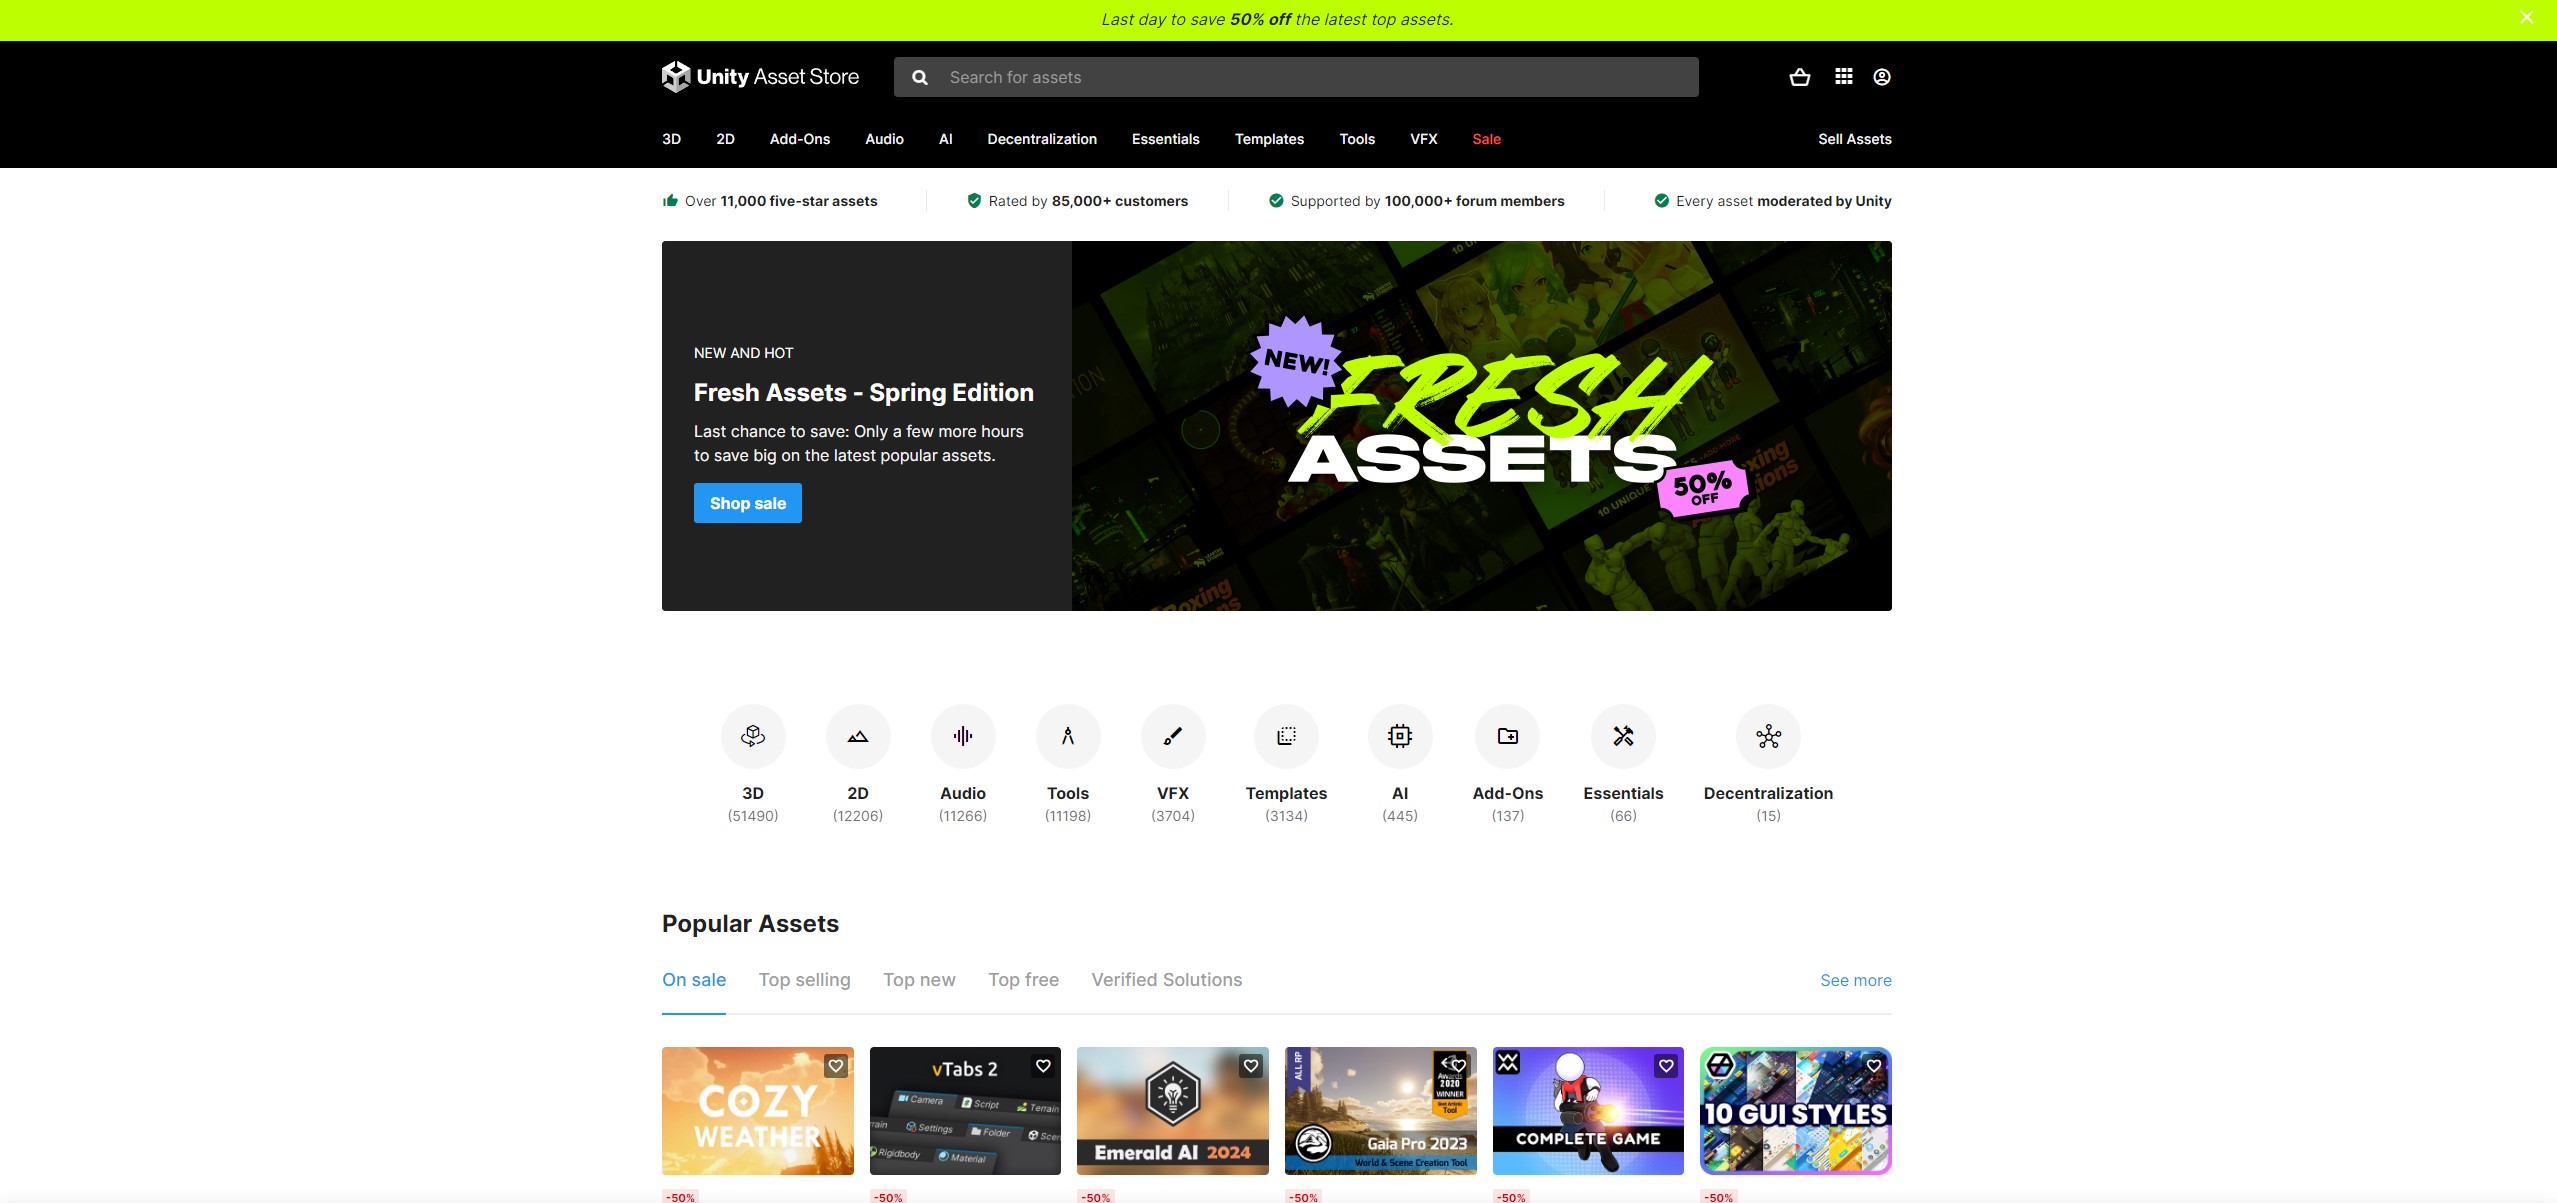
One of the most thrilling aspects of game development in Unity is the ability to bring your creative vision to life using a vast array of assets. Unity simplifies the process of importing assets, whether they are 2D sprites, 3D models, animations, sounds, or any other game assets. Understanding how to efficiently import and manage these assets is crucial for a streamlined development process.
Types of Assets
Before diving into the import process, it's important to recognize the types of assets you'll work with:
2D Assets: These include textures, sprites, and 2D animations. They're often used for backgrounds, characters, and UI elements in 2D games.
3D Models: From simple shapes to complex characters, 3D models are the building blocks of your game world. Formats like FBX, OBJ, and Blender files are commonly used.
Audio Files: Sound effects and music tracks add an essential layer of immersion to your game. Unity supports a variety of audio formats, including MP3, WAV, and OGG.
Scripts: Scripts are written in C# and control the logic and behavior of your game. They're not "imported" in the traditional sense but are crucial assets in game development.
Importing Process
The process of importing assets into Unity is designed to be as seamless as possible. Here's how you can import different types of assets:
Drag and Drop: The simplest method is to drag files directly from your file explorer into the Unity Editor's Project Panel. Unity will automatically process and import the assets into your project.
Asset Store: Unity's Asset Store is a marketplace filled with ready-to-use assets. You can download and import assets directly into your project without leaving the editor.
Custom Packages: Assets can be bundled into Unity Package files (.unitypackage). Importing a package is as simple as double-clicking the file or using the Assets > Import Package menu option. This method is ideal for sharing assets between projects or with other developers.
Managing Assets
Effective asset management is key to maintaining an organized and efficient project. Here are some tips:
Folder Structure: Organize your assets into folders within the Project Panel. Common categories include Models, Textures, Audio, and Scripts.
Asset Naming: Adopt a consistent naming convention for your assets to make them easily identifiable.
Optimization: Consider the performance impact of your assets. For example, higher resolution textures and complex 3D models require more memory and processing power.
Utilizing Assets
Once imported, assets can be dragged from the Project Panel into the Scene View or Hierarchy Panel to include them in your game. You can also assign assets to specific components. For example, audio clips can be assigned to an AudioSource component to play sounds in your game.
Understanding and mastering the import and management of assets are fundamental skills in Unity game development. By following best practices, you can ensure a smooth development process and focus on bringing your creative visions to life.
Starting Your First Project
Embarking on your first game development project can be daunting. However, Unity makes this journey smoother with templates and resources tailored for beginners.
Creating a New Project
Launch Unity Hub: Unity Hub is a management tool that allows you to organize multiple Unity projects and versions. It's the starting point for creating new projects.
New Project: Click on the 'New Project' button to start the creation process. You'll be prompted to choose a template based on the type of game or application you're developing.
Project Settings: Enter a project name, select a location on your computer to save the project, and choose the Unity version you wish to use. Unity Hub allows you to manage different Unity versions for various projects.
Choosing the Right Template
Unity offers several project templates that pre-configure your environment for specific types of games or applications. Choosing the right template is crucial as it sets up the editor, asset import settings, and project structure to best suit your project's needs.
3D: Ideal for projects involving three-dimensional environments. It sets up the editor and lighting settings optimized for 3D development.
2D: Tailored for two-dimensional games, this template configures the Unity Editor for 2D development, including sprite and animation import settings.
Universal Render Pipeline (URP): Offers a balance between stunning graphics and performance across a wide range of devices. Suitable for both 2D and 3D projects that require advanced lighting and rendering techniques.
High Definition Render Pipeline (HDRP): Best for projects demanding high-fidelity graphics on powerful hardware. HDRP is perfect for creating visually intensive games or simulations on PC and consoles.
VR/AR: These templates are designed for virtual or augmented reality projects, providing the necessary settings and frameworks to start building immersive experiences.
Basic Concepts in Game Development
Understanding the foundational concepts of game development is essential for navigating Unity and bringing your projects to life. Here are some of the core concepts you'll encounter:
Game Objects and Components
Game Objects: The building blocks of your Unity game. Everything in your game scene, from characters and obstacles to lights and cameras, is a GameObject.
Components: Attachable elements that give GameObjects behavior and properties. Components can be anything from physical properties, like Rigidbodies for physics interactions, to visual aspects, like Mesh Renderers for displaying 3D models.
Scenes and Assets
Scenes: Think of each scene as a distinct level or section of your game. A project can contain multiple scenes, and you can switch between them during gameplay.
Assets: Assets are the resources your game uses, such as models, textures, audio clips, and scripts. Efficiently managing assets is key to a smooth development process.
Scripting
C# in Unity: Unity uses C# for scripting, allowing you to control game behavior, interact with input, and manipulate GameObjects and scenes dynamically.
MonoBehaviour: The base class from which most scripts derive. It provides access to Unity-specific functions like Start(), Update(), and many others for game logic.
Starting your first project in Unity is just the beginning of a thrilling journey into game development. By choosing the right template and understanding the basic concepts, you're well on your way to turning your creative ideas into playable games. Remember, experimentation and continuous learning are key to mastering Unity and game development.
Scripting in Unity
Scripting is a cornerstone of game development in Unity, allowing you to breathe life into your game's characters, environments, and mechanics. Unity uses C# (C Sharp), a powerful, versatile programming language that balances ease of use with the depth required for complex game development tasks. Here's how to get started with scripting in Unity:
Learning C# for Unity
Understand the Basics: Before diving into Unity-specific scripting, it's essential to have a grasp of C# fundamentals. This includes understanding variables, control flow (if statements, loops), functions/methods, and classes.
Unity Scripting API: Unity's Scripting API is an extensive documentation resource that provides detailed information on all the classes, methods, and properties you can use in your scripts. Familiarizing yourself with this API is crucial for effective scripting.
Tutorials and Courses: There are numerous online resources, tutorials, and courses specifically designed to teach C# for Unity. These range from beginner to advanced levels, covering everything from basic syntax to complex game development patterns.
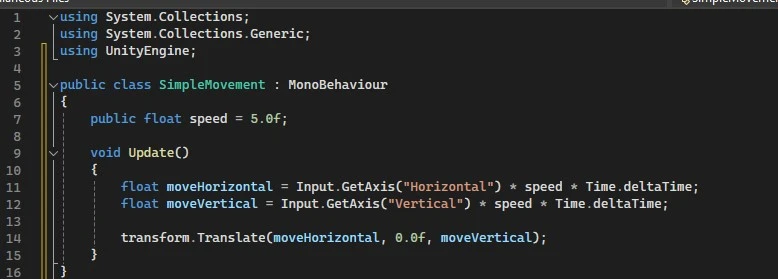
Implementing Game Mechanics
Game mechanics are the rules and systems that drive the gameplay experience. Scripting in Unity allows you to implement these mechanics, whether they're simple interactions like jumping and collecting items, or more complex systems like inventory management or AI behaviors.
Player Movement: One of the first mechanics many developers implement is player movement. This involves capturing input from the keyboard or a gamepad and translating that into movement within the game world.
Interactions: Implementing interactions between the player and the game environment, such as picking up items or triggering events when the player reaches a certain location.
Gameplay Systems: More complex mechanics can include things like health systems, inventory, puzzles, or enemy AI. These systems require a deeper understanding of C# and Unity's functionalities.
Best Practices for Scripting in Unity
Keep It Organized: Maintain a clean and organized script structure. Use comments to describe what your code is doing and organize your scripts into folders in the Unity project window.
Modular Design: Write reusable and modular code. Functions that perform specific tasks can be reused across different projects or within different parts of the same project.
Optimization: Be mindful of performance. Avoid unnecessary calculations in the Update() method, use object pooling for frequently created and destroyed objects, and consider the complexity of your scripts on mobile devices.
Scripting in Unity opens up endless possibilities for creating dynamic and interactive game experiences. By learning C# and applying best practices in your scripting process, you'll be well-equipped to implement any game mechanic you can imagine. Whether you're creating a simple mobile game or a complex PC title, the power of scripting in Unity is a key tool in your game development arsenal.
Building and Sharing Your Game
Once you've developed your game in Unity, the next steps are building it for your target platforms and sharing it with the world. Unity's flexible build system allows you to deploy your game across a wide range of devices, including PC, consoles, mobile devices, and web browsers. Here's how to prepare your game for sharing and distribution:
Preparing for Build
Optimization: Before building your game, ensure it's optimized for the platforms you're targeting. This includes optimizing assets, ensuring efficient scripting, and configuring the quality settings for each platform.
Testing: Rigorous testing across different devices is crucial to identify and fix any bugs or performance issues. Unity's profiler and other debugging tools can help you optimize your game's performance.
Building Your Game
Choose Your Platform: Unity supports a multitude of platforms. Select your target platform in the Build Settings window.
Build Settings: Configure the specific settings for your chosen platform. This includes screen resolution, orientation, and other platform-specific settings.
Build the Game: Once you're satisfied with your settings and the game's performance, click the Build button to compile your game into an executable package for your chosen platform.
Publishing Your Game
Publishing your game is the final step in the game development process, making your game available to players around the world. Here's what you need to know:
Choosing a Platform
PC and Consoles: Platforms like Steam, Xbox, PlayStation, and Nintendo Switch have their own publishing processes and requirements. Research each platform's requirements, such as age ratings and content guidelines.
Mobile: For mobile games, the Google Play Store and Apple App Store are the primary distribution channels. Familiarize yourself with their submission guidelines, including app metadata, privacy policies, and in-app purchases.
Web: Web-based games can be hosted on your own website or platforms like itch.io, which offer easy sharing and accessibility.
Marketing and Promotion
Create a Press Kit: A press kit should include your game's logo, screenshots, videos, and a description. This is essential for attracting the attention of the press and influencers.
Social Media and Communities: Utilize social media platforms and online communities related to gaming to share news and updates about your game. Engaging with your audience is key to building a fan base.
Launch Strategy: Consider how you'll launch your game. This could involve early access periods, beta testing with community feedback, or coordinating with influencers for game reviews.
Conclusion
Starting your journey in game development with Unity opens up a world of possibilities. While the learning curve can be steep, the sense of accomplishment in bringing your ideas to life is unparalleled. Unity not only serves as a powerful tool for game development but also as a gateway to a vibrant community of creators and developers.
Remember, every expert was once a beginner. With patience, practice, and persistence, you can transform your vision into a playable reality. Welcome to the exciting world of Unity game development!
Ready to Bring Your Game Idea to Life?
Embarking on your game development journey can be thrilling, yet challenging. At Farom Studio, we understand the intricacies of turning your vision into reality. Our team of expert developers specializes in Unity, bringing a wealth of experience and creativity to each project.
Why Choose Farom Studio?
Expertise in Unity: We live and breathe Unity, ensuring your project leverages the latest features and best practices.
Customized Solutions: From indie games to large-scale productions, we tailor our approach to meet your unique needs.
Passionate Team: Our developers are not just skilled; they're gamers at heart, dedicated to crafting memorable experiences.
Whether you're looking to develop your first game or take your existing project to the next level, Farom Studio is here to help. Let's make your game development dreams a reality.
Contact Us Today to discuss your project and how we can bring your vision to the screen. Your journey starts here.
More posts

Bug fixes ongoing. New loot system and animations in progress. UI updates including squad member info and radial menu improvements.
New patch improves optimization, adds equip option for craftable items, restricts running while eating/drinking, and introduces server management console commands.

Survivor Update: Reworked inventory for efficient management. Campfires now require fuel. Weapon rebalancing and ongoing map improvements. See you next week.

As we promised, we present the crowdfunding company of the Lost Region game. Unreal Engine game.